Unless you have been living under a rock, you probably heard that Microsoft Open-Sourced PowerShell and made it available on Linux/MacOS!. Everyone wants to give this thing a try. Want to test it out quick? Here’s how:
Versions used in this example:
Windows 10 Build 10586.545 (Hyper-V Host)
CentOS 7
WinSCP 5.9.1
A quick assumption (I know – we all know what happens when we assume) – You already have Hyper-V up and running. If not, read this post by @adbertram about Essential PowerShell Cmdlets For Managing Hyper-V. It’s a really well put together article.
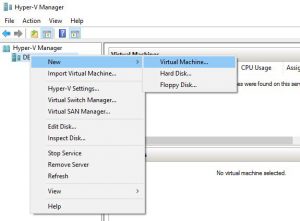
Start by downloading CentOS. The link above will take you to the download page – in this example I will use the DVD ISO. Since the PowerShell repo is still in Alpha, I am going to stick with CentOS. Open Hyper-V Manager, and create a new VM. Do this by right-clicking on your computer in the tree pane, and selecting New – Virtual Machine.
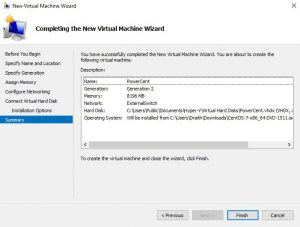
Click through the wizard, choosing a VM name, the generation (I used 2 for this demo), memory (8gb), the network (make sure it has internet access), where to store the VHD, and finally – under the installation options – select “Install an operating system from a bootable image file”. Point it to the CentOS iso you downloaded previously. Finish the wizard.
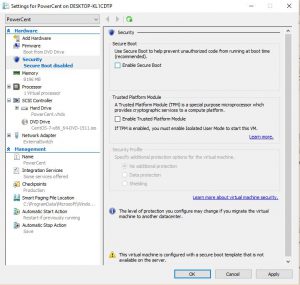
Before we start the VM we will need to disable Secure Boot, otherwise we won’t be able to load the DVD image. Right click on the new VM, click Settings, Security, and uncheck the box for Secure Boot.
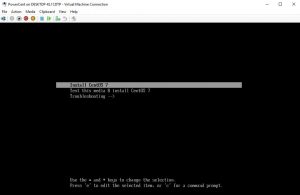
Start and connect to the VM. When this menu appears, select ‘Install CentOS 7″.
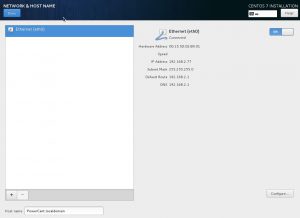
Installing CentOS is pretty straight forward. Select your language for setup, click Continue. On the next screen, you are going to see the “Installation Summary” screen. Here you will probably see some items marked with a classic warning symbol. In my demo, it was the “Installation Destination” section. Simply going into that section and selecting done is enough to clear it. There is, however, one change we want to make before starting the installation. Click on the “Network & Host Name” section, set the hostname, and turn on eth0. We need this vm to be able to access the internet, which is difficult without an active network adapter.
Click Begin Installation. The install will begin to run, and during this time you should go ahead and set the root password, and create a non-root user (not required, but a good idea anyway). Setup doesn’t take long, so in a few minutes we are presented “Complete!” message. Click the Reboot button.
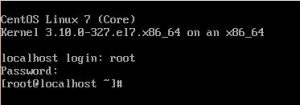
Within a minute or two, you should be presented with a CentOS Linux 7 login. Go ahead and log in with root.
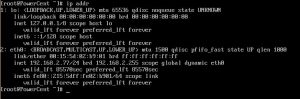
If you don’t already have it installed, download and install WinSCP. We are going to need to get the RPM for PowerShell from Github, and move it to the CentOS VM. For this demo, we can get the RPM here. Once we have the RPM downloaded, launch WinSCP and connect to the CentOS VM. Depending on networking, it might be necessary to connect via IP address. In order to get the IP in this minimal CentOS install, we are going to need to use ‘ip addr’. Note the IP for eth0.
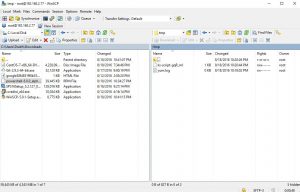
In WinSCP, connect to the VM using root, and copy the rpm to the /tmp directory.
Now the fun begins. Go back to the CentOS VM, and run the following command:
sudo yum -y install /tmp/powershell-6.0.0_alpha.9-1.el7.centos.x86_64.rpm
This command tells the VM to install the PowerShell rpm we downloaded, and the ‘-y’ tells it to automatically install the 2 dependencies. When it’s done, you are rewarded with something like this
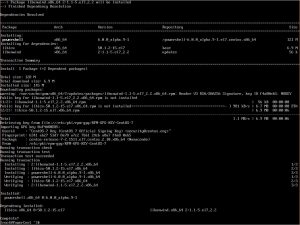
Once this is done – we have PowerShell on this CentOS VM. That is not something I thought I would type anytime soon 🙂 Why don’t we see if it works. It’s basically another shell, so let’s start by typing ‘powershell’.

Take a moment to look at this – a Microsoft PowerShell prompt, running in a Linux VM. Want proof? Do a get-service, but look for something uniquely *nix.
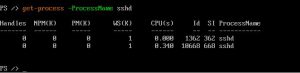
And there you go. Microsoft dropped the mic in a big way on this one. VERY well done.