Today I was working on one of my large-scale enterprise automation scripts, when a common annoyance reared it’s ugly head. When dealing with multi-threaded applications, in this case Runspaces, it’s common to have one runspace trying to access a resource another runspace is currently using. For example – writing some output data to a log file. If two or more runspaces attempt to access the same log at the same time you will receive an error message. This isn’t a complete stoppage when dealing with log files, but if a critical resource is locked then your script could certainly fail.
So what is the easiest way to get around this? Enter the humble Mutex. There are several other posts that deal with Mutex locking, so I won’t go over the basics. Here I want to share some simple code that makes use of the mutex for writing to a log file.
The code below is a sample write-log function that takes 4 parameters. 3 of them are mandatory – Text for the log entry, name of the log to write to, and the ‘level’ of the entry. Level is really only used to help color coding and reading of the log in something like CMTrace. The last of the four parameters is ‘UseMutex’. This is what is going to tell our function whether or not to lock the resource being accessed.
<#
    .SYNOPSIS
        Simple function to write to a log file

    .DESCRIPTION
        This function will write to a log file, pre-pending the date/time, level of detail, and supplied information

    .PARAMETER text
        This is the main text to log

    .PARAMETER Level
        INFO,WARN,ERROR,DEBUG

    .PARAMETER Log
        Name of the log file to send the data to.

    .PARAMETER UseMutex
        A description of the UseMutex parameter.

    .EXAMPLE
        write-log -text "This is the main problem." -level ERROR -log c:\test.log

    .NOTES
        Created by Donnie Taylor.
        Version 1.0     Date 4/5/2016
#>
function Write-Log
{
    param
    (
        [Parameter(Mandatory = $true,
                   Position = 0)]
        [ValidateNotNull()]
        [string]$text,
        [Parameter(Mandatory = $true,
                   Position = 1)]
        [ValidateSet('INFO', 'WARN', 'ERROR', 'DEBUG')]
        [string]$level,
        [Parameter(Mandatory = $true,
                   Position = 2)]
        [string]$log,
        [Parameter(Position = 3)]
        [boolean]$UseMutex
    )

    Write-Verbose "Log:  $log"
    $date = (get-date).ToString()
    if (Test-Path $log)
    {
        if ((Get-Item $log).length -gt 5mb)
        {
            $filenamedate = get-date -Format 'MM-dd-yy hh.mm.ss'
            $archivelog = ($log + '.' + $filenamedate + '.archive').Replace('/', '-')
            copy-item $log -Destination $archivelog
            Remove-Item $log -force
            Write-Verbose "Rolled the log."
        }
    }
    $line = $date + '---' + $level + '---' + $text
    if ($UseMutex)
    {
        $LogMutex = New-Object System.Threading.Mutex($false, "LogMutex")
        $LogMutex.WaitOne()|out-null
        $line | out-file -FilePath $log -Append
        $LogMutex.ReleaseMutex()|out-null
    }
    else
    {
        $line | out-file -FilePath $log -Append
    }
}
To write to the log, you use the function like such:
write-log -log c:\temp\output.txt -level INFO -text "This is a log entry" -UseMutex $true
Let’s test this. First, let’s make a script that will fail due to the file being in use. For this example, I am going to use PoshRSJob, which is a personal favorite of mine. I have saved the above function as a module to make sure I can access it from inside the Runspace. Run this script:
import-module C:\blog\PoshRSJob\PoshRSJob.psd1
$I = 1..3000
$I|start-rsjob -Throttle 250 -ScriptBlock{
    param($param)
    import-module C:\blog\write-log.psm1
    Write-Log -log c:\temp\mutex.txt  -level INFO -text $param
}|out-null
Assuming you saved your files in the same locations as mine, and this runs, then you should see something like this when you do a get-rsjob|receive-rsjob:

So what exactly happened here? Well, we told 3000 Runspaces to write their number ($param) to the log file….250 at a time (throttle). That’s obviously going to cause some contention. In fact, if we examine the output file (c:\temp\mutex.txt), and count the actual lines written to it, we will have missed a TON of log entries. On my PC, out of the 3000 that should write, we ended up with only 2813 entries. That is totally unacceptable to miss that many log entries. I’ve exaggerated the issue you will normally see using these large numbers, but this happens all the time when using smaller sets as well. To fix this, we are going to run the same bit of code, but we are going to use the ‘UseMutex’ option in write-log function. This tells each runspace to grab the mutex and attempt to write to the log. If it can’t grab the mutex, it will wait until it can (in this case forever – $LogMutex.WaitOne()|out-null). Run this code:
import-module C:\blog\PoshRSJob\PoshRSJob.psd1
$I = 1..3000
$I|start-rsjob -Throttle 250 -ScriptBlock{
    param($param)
    import-module C:\blog\write-log.psm1
    Write-Log -log c:\temp\mutex.txt  -level INFO -text $param -UseMutex $true
}|out-null
See the ‘-UseMutex’ switch? That should fix our problem. A get-rsjob|receive-rsjob now returns this:
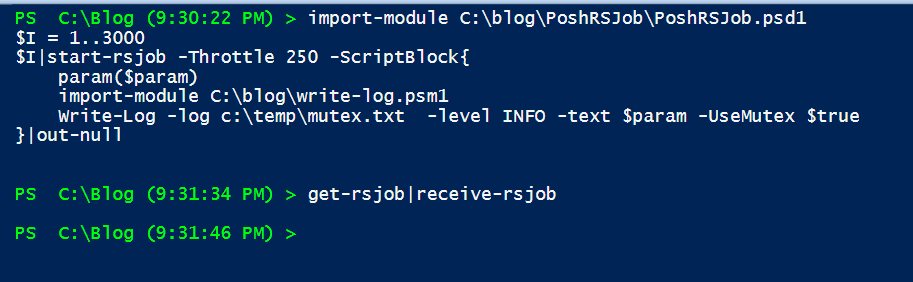
Success! If we examine our output file, we find that all 3000 lines have been written. Using our new write-log function that uses a Mutex, we have solved our locking problem. Coming soon, I will publish the actual code on Github – stay tuned!